Best Super 8 Film and 8mm Film Scanners in 2025
Years ago, people used to record their memories on film. However, if not properly kept,
Years ago, people used to record their memories on film. However, if not properly kept, the film has a tendency to decay. For instance, Super 8 and 8mm films should be stored in a cool, dry place. Nowadays, many people are transferring their old 8mm and Super 8 films to the more robust and adaptable digital or DVD formats.
Sending your films to a professional video conversion facility will ensure the best results, and you even have the option to restore the film through color correction and grain elimination technology. However, if you want to save on costs and make it more personal, you can also make this a worthy do-it-yourself project.
There are many reasons why people are opting to convert their 8mm or Super 8 films to a more playable format. One reason is that sadly, film doesn’t really last forever. Especially if stored in a warmer climate, film has a tendency to be affected by “vinegar syndrome”, which is the common term for cellulose triacetate degradation.
The film breakdown involves the release of acetic acid, which diffuses the surface of the film. Many people are seeing the need to preserve precious family memories or important film memorabilia by converting 8mm film to DVD or digital or Super 8 to digital format. Others just want to enjoy and share these classic movies with their families for years to come.
Converting 8mm and Super 8 to digital format will surely maximize its shelf life and preserve its quality. This modern format is also more convenient. If these are not preserved, they will be lost forever.
Scanners you can use to digitize Super 8 and 8mm films
| 8mm and Super 8 Film Scanner | Image | Resolution | Digital Output | Availability |
|---|---|---|---|---|
| Wolverine 8mm and Super8 Reels Movie Digitizer - Editor's Choice |  | 1080P/ 20 fps | MPEG-4 | |
| Wolverine Titan 8-in-1 High-Resolution Film to Digital Converter |  | 20 megapixels | JPEG snapshots | |
| KODAK SCANZA Digital Film & Slide Scanner |  | 22 megapixels | JPEG | |
| Magnasonic All-In-One High-Resolution 22MP Film Scanner |  | 22 megapixels | JPEG | |
| Wolverine F2D Mighty 20MP 7-in-1 Film to Digital Converter |  | 20 megapixels | JPEG snapshots |
What are Super 8 and 8mm films?
Super 8 and 8mm films were commonly used to record special events and memories from the ‘30s up to the ‘80s. Let’s clear some confusion on the names used in referring to film formats. Videotape formats called 8mm, Hi8 and Digital 8 videotape were used in camcorders manufactured by major brands such as Sharp, Canon, and Sony. These camcorder videotapes are not the ones being referred to in this article.
In the same way, Super 8 and 8mm films are also subjects of confusion. Both of these films are wide from edge to edge, and at first glance, look quite similar to each other. Both 8mm and Super 8 films are used to record home movies, providing generations with cultural gems about real life with family and friends. However, the Super 8 film has smaller sprocket holes on the edge.
Super 8 films
The Super 8 format was introduced by Kodak in 1965. Along with the film, they also sold compatible cameras and projectors. It is easier to use than the 8mm film because the cartridge loader did not need reloading or re-threading halfway through, and it also had fewer jamming issues compared to other film formats.
This format was also very convenient because it was packaged in plastic cartridges. It also has smaller and more widely-spaced perforations.
Super 8 films have much smaller sprocket holes. The holes are aligned to the middle of the frame. This means that the image area is bigger, making it have more quality images.
Super 8 films also have up to 1000 lines of resolution. The width of each film, including the holes is 7.90mm. The frame itself measures 5.79 mm in width and 4.01 mm in height. The size of the frame on a Super 8 is 50% bigger compared to the 8mm film, which leads to a sharper picture. In fact, the Super 8 film format is still being used in the art film community for commercials, short films and music videos as a cheaper alternative to high-definition video.
Super 8 films was a breakthrough when it was released because it removed the need to manually thread the film on the spool. This means that loading the camera required only two seconds, or even less.
Before the Super 8 film was released, the camera had to be opened and the spools flipped so that the unexposed film edge could be recorded on during the second pass through the camera. The Super 8 also revolutionized the amateur film genre because it provided great image quality.
The whole 50-foot cartridge could now be shot without interruption. Although the original movies made on Super 8 were silent, in 1973, the film began to be made with a magnetic strip, making it possible to record sound with the image. The Super 8 film began to wane in popularity in the 1980s when newer technologies such as the camcorder became the default method for creating home videos.
Nowadays, Super 8 films can still be purchased in some specialty stores.
8mm films
 8mm films were released by the Eastman Kodak company in 1932. During that time, professional motion pictures were shot on 35 mm wide films, while semi-professional and amateur filmmakers were using film that was less than half as wide, at 16mm.
As film-making became more widespread, more and more people wanted to capture their personal memories on film. However, the 16mm is still not a viable option for many because it could not capture sound. Eastman Kodak created a more affordable alternative, the 8mm, which became commercially available for widespread use.
Also called Regular 8mm film, it was retailed in spools with 16mm film. The 8mm is filmed on two separate edges to maximize time for filming.
The 8mm film passes through the cameras twice. On its first pass, the film is exposed on half its width, and on the second pass, it is flipped and exposed on its other side. When it is developed, the 16mm wide film is cut through in half, thus making it 8mm.
On a standard 8mm film, the holes are not aligned in the middle of each frame. The entire film including the holes measures 7.90 mm in width. The frame itself measures 4.5 mm in width and 3.3 mm in height. 8mm is usually measured per foot. The approximate footage of a reel can be obtained by first measuring the diameter of the reel. The 8mm film was not sold anymore in the 1990s, although there are still some specialty stores that still sell them.
Some of the best scanners available on the market
If you have decided to do your very own film to DVD/digital conversion, here is a review of some of the best scanners available on the market today. We have thoroughly examined their features, accessories, and digital output and have put together a list of the pros and cons of each product to help you decide which one will suit you best.
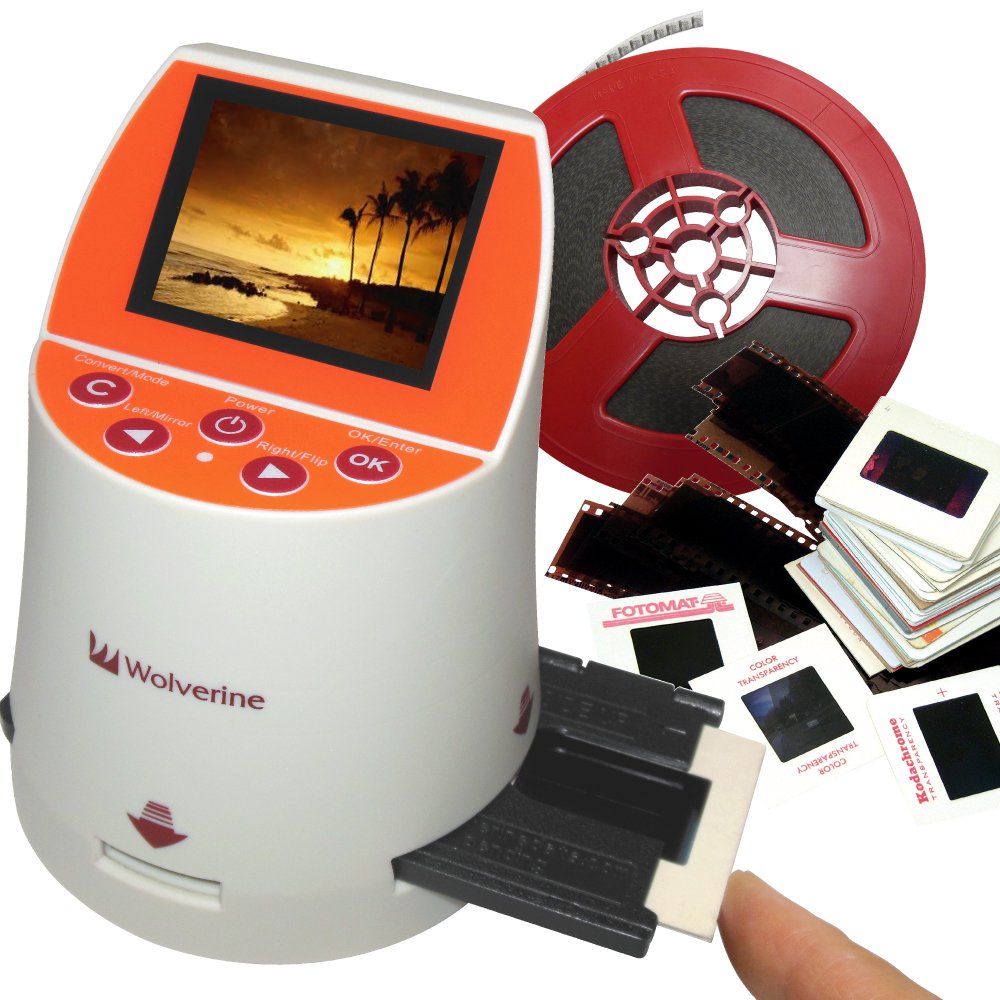
1. Wolverine 8mm and Super8 Reels Movie Digitizer
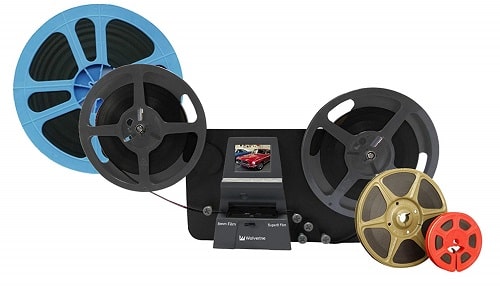
Model: Wolverine F2D MovieMaker Pro
Features and Accessories
The Wolverine 8mm & Super 8 Reels is equipped with a 2.4” LCD. The product features frame by frame digitizing and the Super 8 or 8mm film should be mounted with the correct reel, which should be up to 5 inches in diameter before recording. The Wolverine digitizes at 20 fps and it is easy to use. It is also easy to slow down the video if you plan to edit it. This is a stand-alone machine so no software or drivers are needed to run it.
Upon purchase, the package contains 1 power adapter, 1 USB Cable, 1 TV-OUT cable, 5” reel in 8mm diameter hole, 1 grey reel adapter and 1 red reel adapter, 1 brush and 1 user manual.
Digital Output
This film scanner converts 8mm and Super 8 movies into 1080p MP4 digital movie files. It is also easy to save digital movies because it scans and saves movies straight into the SD cards. Saving digital output requires an external memory card of up to 32 GB. It is compatible with all major operating systems such as Mac and Windows. Its TV output type is NTSC.
Pros and Cons
On the plus side, the quality of the video is really quite impressive. Another convenient aspect is that the Wolverine shuts off automatically when it detects a jam. Purchasing this scanner will save you a lot of money because it is reasonably priced. You should also consider that professional digitizers are charging a dollar per foot of film.
One issue is that the yellow color in the movies comes out really bright, and you need to adjust the color saturation in order to get the correct yellow hue. Another issue is that we noticed that the film spools a little too fast when the film supply reel spins forward because it has a tendency to slacken, which results in a video transfer that is a little jumpy. Also, if there are splices in your home movies, you can’t leave the Wolverine unattended for long periods of time because aforesaid splices got caught up. However, this is attributed to the quality of the film rather than the product itself.
2. Wolverine Titan 8-in-1 High-Resolution Film to Digital Converter
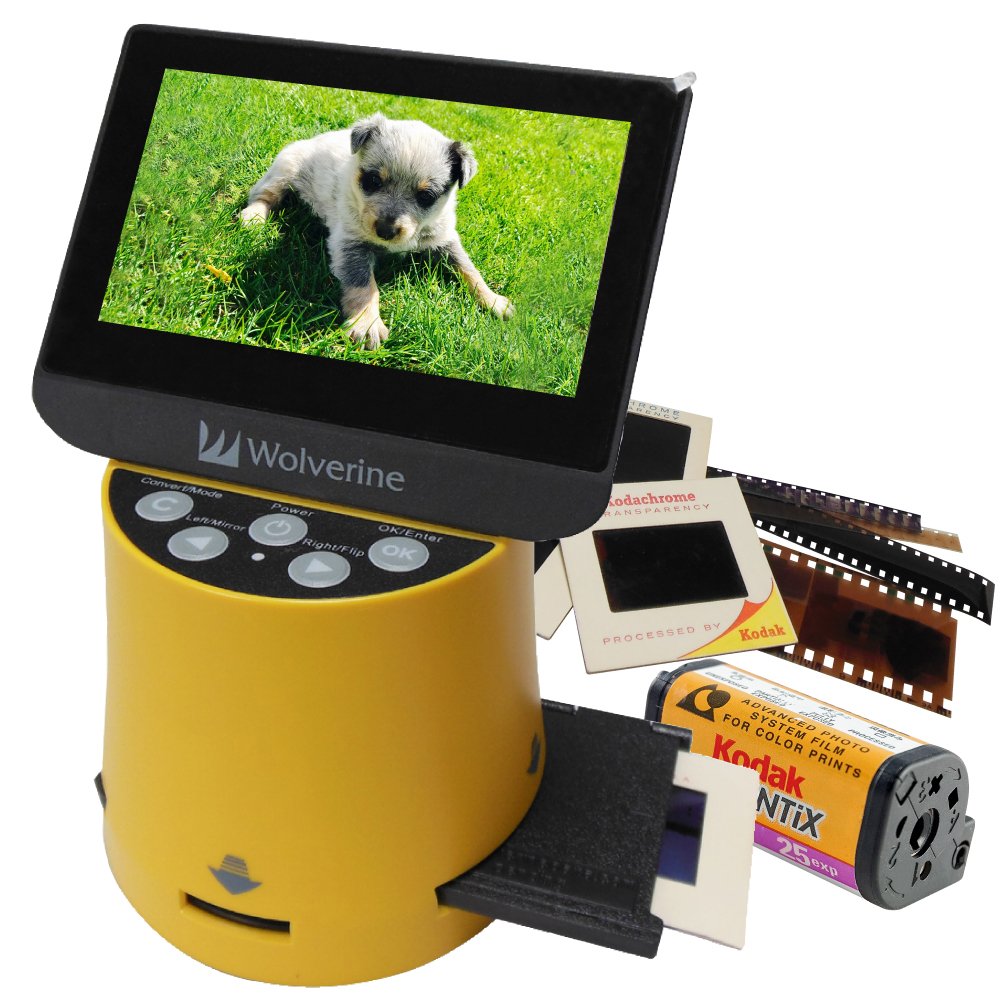
Features and Accessories
This 8-in-1 digital converted can amazingly support 8 film types: 35mm photo film and archive, 127, 126, 100, aps slides and negatives, and regular 8mm and super 8 movies. Its color screen is larger than most, at 4.3”.
The product includes new HDMI to-out jack in order to view movies and images in high-definition. It is quite convenient to use because of its fast-loading slide and negative adapter that simply lets you push the slides and negatives into a slot. In less than three seconds, the slides and negatives are converted into digital images. The package contains F2D Titan converter, slide and negative adapters, 8mm and Super 8 insert, USB power adapter, USB cable, cleaning brush and user manual.
Digital Output
All images and movies can be directly saved into its internal memory or directly into an SD or SDHC memory card. The digital output is in JPEG snapshots, and if you take enough frames, it can be reassembled into video format. The converted files can easily be uploaded to Windows or Mac, and it can also be viewed directly on TV.
Pros and Cons
One of the best things about the Wolverine Titan is that it is easy to use and it scans quickly. The design of the large screen is also quite convenient.
One weakness of the product is that the digitized results have some issues with color balance. It works well in well-lighted scenes, but when it comes to darker shots especially done indoors, the color balance gets terribly distorted.
3. KODAK SCANZA Digital Film & Slide Scanner
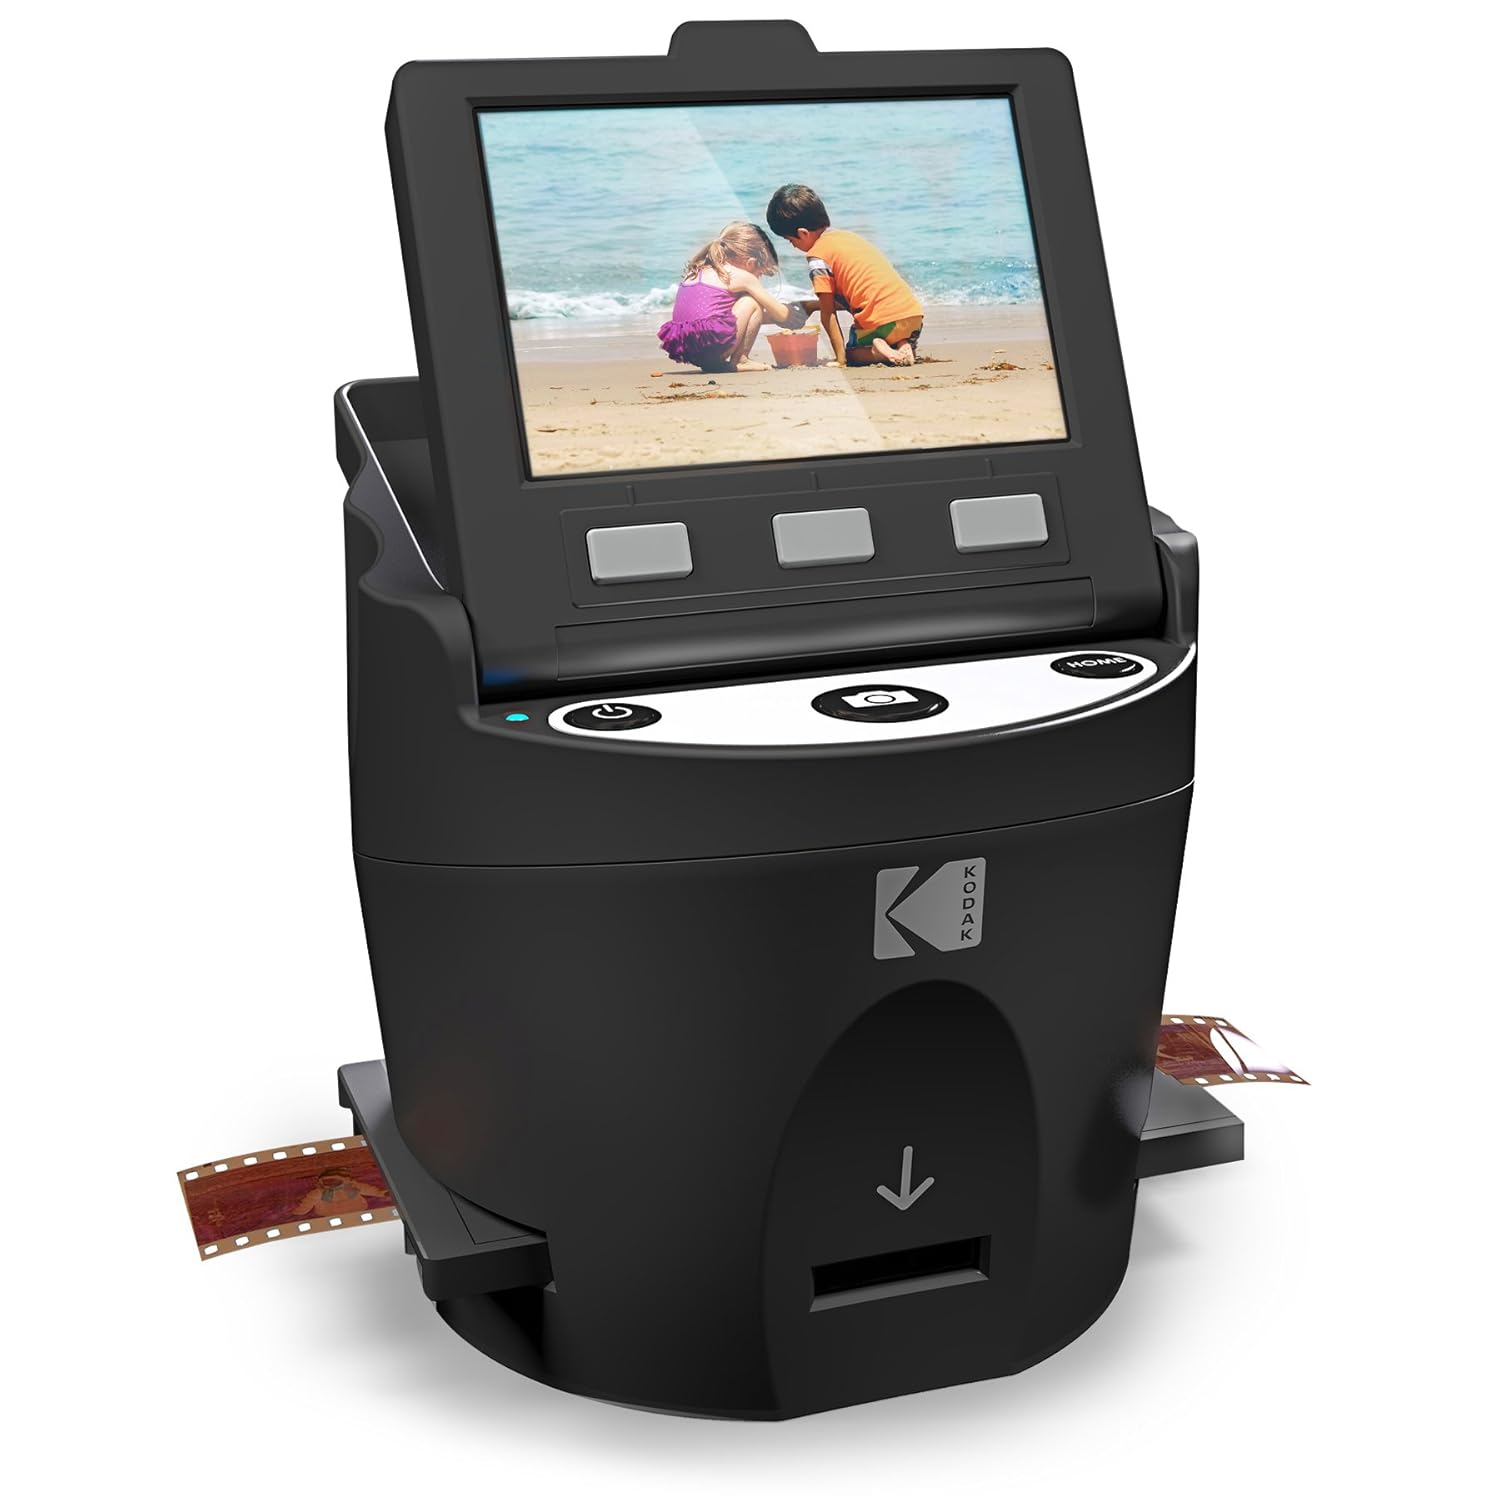
Features and Accessories
The KODAK SCANZA converts 35mm, 11, 126, Super 8 and 8mm film slides and negatives into JPEG. It has a bright 3.5”-sized LCD display with high-definition, built-in color. You can easily tilt the screen to easily view the images. It is easy to operate with big one-touch and one-step buttons. The interface has three modes: (1) Gallery, which allows the user to view and edit the image; (2) Capture for scanning, saving, and adjusting image brightness, and (3) Setting, which allows you to alter the resolution and set the LCD brightness between 14 to 22 megapixels.
The product comes with film inserts and adapters. It also comes with a USB Power cable, HDMI cable, AC adapter, Video Cable, and cleaning brush.
Digital Output
The digital output is in JPEG. You can transfer the output to a microSD card.
Pros and Cons
Scanning is very convenient and the films, slides, and negatives are processed into digital images fast. I am quite satisfied with this scanner because of its good performance and fast operation.
The only negative thing I can say is that the digital images are not as sharp as I wanted them to be, but that can be easily remedied through picture editing.
4. Magnasonic All-In-One High-Resolution 22MP Film Scanner
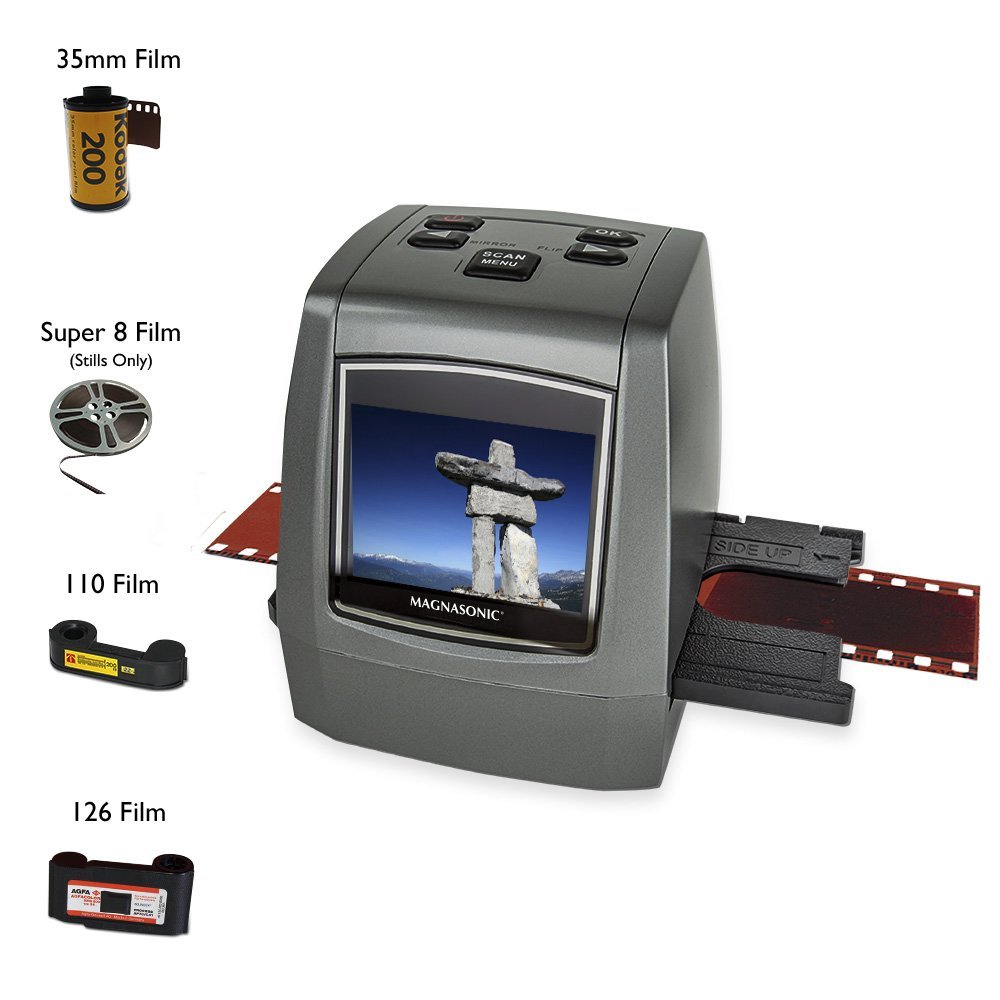
Features and Accessories
The Magnasonic has a 2.4 inch LCD screen and it comes with a Video-Out TV cable. It has an SD card slot expansion so that you can hold more digital images.
After scanning, loading, and saving, you are able to have digital images in less than 5 seconds.
You can edit the photo right away using its plug-and-play interface, and you don’t even need to use software or install a separate driver. There are pre-installed film profiles, which eliminates the need for editing software.
Digital Output
It can digitize still shots of Super 8 films. The output is in high-resolution 22MP JPEG files.
Pros and Cons
One of the strengths of the Magnasonic is its 128 MB built-in memory, which means it can store more images than other scanners. This is also a great device because you can edit the photos straightaway without the need for editing software.
However, the color adjustment feature does not work well for some photos, so you may still need to use photo editing software for them.
5. Wolverine F2D Mighty 20MP 7-in-1 Film to Digital Converter
Features and Accessories
This is the earlier version of the Wolverine Titan 8-in-1 reviewed previously. It converts 135 negative and slide, 127 negative and slide, 126 negative and slide, 110 negative, 110 slide, library film, and 8mm and Super 8 films. It has adapters for loading slides and negatives quickly and efficiently. You can save the images to its internal memory, which can hold up to 40 images, or you can save it in an SD card.
This converter has a 2.4 color screen and a TV-out jack. It is compatible to both Mac and Windows.
The package contains the following accessories: 110 negative insert, 110 slide insert, 8mm/Super 8 insert, 35 mm negative and slide adapter, USB power adapter, USB cable, and a cleaning brush.
Digital Output
Your 8mm and Super 8 films will be converted in the form of JPEG snap shots. Just like with the Wolverine Titan, if you take enough frames, it can easily be reassembled into video. The maximum digital image resolution is 20 megapixels.
Pros and Cons
Just like the previous Wolverine product, this is very easy to use and the slide inserts let you finish the job faster.
One major issue about this product is that the picture quality is not very good, with grainy images and inconsistent color quality.
How to convert Super 8 and 8mm films to Digital
If you want to convert your Super 8 or 8mm to digital or DVD format, there are many processes and formats to choose from.
Here are some ways to convert 8mm and Super 8 films to digital.
1. Videotaping
Videotaping is the simplest way to transfer film. The method is done by simply projecting the film onto a wall and recording the film using your camcorder or video camera. The best screening can be achieved if the film is projected on a white wall. Although it is a simple and straightforward method, you need to control the speed variable of the film and it sometimes results in distortion, resulting in trapezoid-shaped images. These distorted images will have to be edited. The recorded film can then be transferred to your laptop or desktop computer.
2. Telecine Method
The issue of being off-axis, which is usually created when film projection on a wall is employed, will be corrected with the telecine method. The telecine method uses a mirror, reflecting the images onto a back screen. The result is that it aligns the axis of the camcorder and the projector. Telecines generated real-time video at the expense of noisy and unstable images. For great results, you can also use a speed projector. It is possible to connect telecines to a camcorder or computer.
Here is the step-by-step process of this transfer method, transferring an 8mm film to DVD or other digital formats:
- Clean and repair every inch of the film. Depending on the damage, this could be a time-consuming process. Look for bad splices, which will be re-spliced to ensure a smooth transfer.
- Backlight the 8 mm film with diffused lighting. The light source should also have low wattage and it is not so hot. It will not scorch your film.
- Using a magnifying-glass-like device or a quality 3-CCD camera, the surface of the 8mm film is then reflected. In this process, it is important to check that nothing comes in between the film and the imaging equipment. This ensures an exact duplication of the film being copied.
- The 8mm movie reel that was transferred will be properly labelled on a DVD menu. It is best to use high-quality DVD brands, which could last for up to a hundred years or more.
- If your option is transferring the 8mm film to a digital file, you can create an .avi, .mov, or .mp4 file then copy it into a thumb drive.
3. Using a DSLR
Another alternative for transferring film to digital format is using a DSLR camera. A DSLR camera can usually shoot a video and it can also access manual shutter/aperture settings. With this method, you can actually capture the film images from the lens of the projector into the camera. The film content can then be recorded straight into a memory card or it can be sent via live video stream to a USB.
4. Film Scanning
Film scanners capture images one frame at a time. They scan the film one line or a pixel at a time. The film should be scanned on a sprocket-less, roller-based film scanner. Most film scanners continuously advance the film and can register each frame without sprocket holes.
Super 8 film scanner or 8mm film scanner are both used to convert professional conversion services give customers scan resolutions ranging from SD (480 lines), HD (1080 lines), 2K (1556 lines) and 4k (3112 lines). The main hindrance to getting professional services is the cost.
There used to be a time when high-end film scanners are the only ones available in the market, and they are used for capturing professionally-made movies and motion pictures. Nowadays, film scanners are more affordable and are commercially available. Doing it yourself is now a viable and cost-efficient alternative.
In this process, the film is first inspected, cleaned, conditioned, repaired, and spliced. When all this is done, the film is captured using a scanner. Then, the movie is then prepared either for DVD, MPEG, or AVI files.
Format Output
There are several conversion formats to choose from: DVD and Blu-ray formats are ideal for TV viewing, but not for editing. MPEG, AVI and HD-AVI formats are good for editing but not for TV viewing. The DPX format is for professional editing only. You can keep the digital formats on a secure thumb drive.
Your converted movies can be enhanced by adding title slides, which are short clips inserted into the video which provides a general description before the scene actually starts. You also have the option to add stock music to your movies. Professional film transfer technicians can place a soundtrack onto your DVD transfer.
I recently purchased a Reflecta scanner for transferring Super8 film to SD card.
I discovered that it will transfer the visual image only, but not the sound track.
I wish to acquire some sort of device that could be used in conjunction with the Reflecta to transfer the sound track
(and to synchronise it with the visuals).
Is there anything available that would achieve this?
Hello Martin,
You cannot capture sounds with Super 8 scanners because it is a frame by frame scanning. Unfortunately including sounds with Super 8 films is up to the professional scanning services.
“ There used to be a time when high-end film scanners are the only ones available in the market, and they are used for capturing professionally-made movies and motion pictures. Nowadays, film scanners are more affordable and are commercially available. Doing it yourself is now a viable and cost-efficient alternative.‘
NOWADAYS THE FILM SCANNERS ARE COMMERCIALLY AFFORDABLE AND MAY BE A LOT OF FUN FOR YOUR KIDS, AS MAJORITY OF THEM SUFFER MYRIAD OF PROBLEMS AND MAJORITY ARE UNABLE TO SCAN CERTAIN COLOURS PROPERLY IN OTHER WORDS ESPECIALLY FOR 8 MM FILMS ARE USELESS.
You are a dork, Pete.
Does the author not realize that only the first wolverine actually converts super 8 or 8mm films? Otherwise, you appear to be scanning one single frame at a time, by hand… there are 24 frames in one second of film. This would take forever … So, the other scanners are good for capturing a single frame from a film, not for scanning a film real.
The best transfer image quality for Super 8 and Regular 8 movie film is achieved through the use of a film scanner, although if you can find a telecine service that uses the Sony BM2100 telecine projector into a high definition camera, you can get almost as good results with the added bonus that you can simultaneously transfer the sound in perfect sync with picture. The Sony uses a single bladed shutter and uses the sync timing information from the video system to eliminate flicker or raster bars from the results at any transfer speed. This is especially important for Super 8 sound films shot at 18 fps. This eliminates any post production to match up sound and picture. The problem is that the Sony machines are exceedingly rare so finding a service that has one is not easy. For scanned films with sound, you have to transfer the sound separately. The critical thing with that is, that in order generate a synchronized version of the film, whatever device you use to pull the sound off the original film either has to run at exactly the same speed for the duration of the film or be externally controllable to do so. But the problems don’t end there. Most scanners don’t run at either 24 fps or 18 fps, but at some other frame rate and then they compile the individual frames into continuous video footage at 30 fps (for HD video). The problem? What is the duration? Modern film editing software will allow you to lengthen and shorten the duration of both the video and the audio, with or without changing the apparent motion speed on the image or pitch on the audio. But you still have to marry the two in post. So, if you are paying someone else to do this, here’s what you need to do to wind up with something that resembles the Super 8 original. You must add leader that has both a flash frame (I use a small, single punch hole punch for paper with a very small diameter) as well as a beep tone recorded (or using stick on beep tone audio tape made for this purpose) with the 18 frame sound-to-image offset (matching sound is 18 frames ahead of its image) at both the head and tail of the footage. The have your technician transfer the sound to an audio file first and put it into an editing program (Final Cut/ Premiere, etc.) to establish the true running time of the footage. Then, when the image transfer is complete, the location of the sync tone beep on the audio waveform and the flash frame on the footage can be matched perfectly for sync using the timeline visual representation for reference. If the sound transfer device did not run at a steady speed, you may still have some sync drift to deal with. As you can see, film scanners do a great job with image, but they introduce some pretty steep technical challenges for the transfer services. Be prepared to pay for that time. Or buy your own setup if you have a lot of film. You might even make a bit of money starting a transfer service.
Thanks for the great 8mm scanner reviews. I bought the Wolverine Movie Maker Pro over a year ago to transfer my 8mm films. Actually, I split the cost with my friend who also needed to do the same thing. On the upside, it did a surprisingly good job. On the downside, it didn’t like old tape splices and it doesn’t have an uncompressed mp4 option. It compresses the mp4 files akin to a jpeg, which leaves far less data to recover for editing.
The quality of the transferred film was all over the map, mostly no fault of the Wolverine. It depended on whether we shot with Kodachrome 40 or Ektachrome 160 (awful film stock). Generally, the Kodachrome stood the test of time whereas the Ektachrome was kind of a mixed bag. Some of the Ektachrome was downright awful and some was just ok.
I used DaVinci Resolve 17 to edit, color correct and whatever else I needed to do to make each movie look as good as possible. Some of the footage had bad color casts, chromatic aberrations, poor quality sound and a whole lot of other issues. The sound sync was also a challenge. I had to deal with the original camera speed (18 or 24 fps), the projector speed to transfer the sound track (Wave file) file which is 13 frames away from its movie frame, the Wolverine which renders at 20 FPS and DaVinci Resolve which works at 24 FPS. That was the trifecta formula for out of sync and constantly drifting sound. On a happy note, it was fixable. DaVinci’s optical flow feature did a great job to allow the footage to flow smoothly. With today’s technology, you can in many ways make your movies look and sound better than it did back in the day.
I have most of my movies posted on my Super 8mm YouTube channel. There are still a few more to go, which I will post as I complete them. It’s brutally labor intensive to bring these old home movies back from the dead, although well worth the efforts. Some are time capsules and can be emotionally taxing as many of my family members in these films are no longer alive.
Finally, I plan to put together a video tutorial on my 8mm YouTube channel on how to digitize (mp4) and edit your 8mm movies (silent and sound), how to lift the sound track and save it as a wave file.
All of the listed scanners range anywhere from sub-optimal to utter crap. I know this because I’ve tested them all.
Now, if someone could figure out how to make one of those portable automatic roller scanners properly scan film, that’d be wonderful, but as it stands, really the only way to get transfers on the consumer market that don’t look like crap and require less than $50 worth of equipment is as follows.
Buy a high resolution flatbed scanner with a film lamp from the thrift store for $10, line up a cutout (with something like electrical tape) to run your film through, spend about 6 hours messing with it (for a 50 foot reel, because there is no automatic feed on a flatbed scanner), count and crop frames in a video editor, splice it all together, and you’ll have film scans that are watchable. For bulk scans, may your god of choice have mercy on your soul.
I wonder why scanners such as the Wolverine are set to render your films at 20 fps, not a standard rate for any home movie camera I know of.
Also, is there any way to convert the output to 16, 18 or 24 fps that won’t result in a jerky image? I once used a 16mm telecine to scan a silent film. Since it would only scan at 24 fps, I tried using Final Cut Pro to convert to output to 2/3 speed – but the result was achieved by duplicating frames at a regular interval , which caused an unpleasant jerkiness, and the only way to fix this was to eliminate the extra frames, a very long process, which also of course made the film run faster. Eventually I found a compromise that worked pretty well, giving me the speed I wanted with no stutters, but it was ridiculously fiddly and I wouldn’t want to do it that way again. So, is there a better solution than Final Cut (the version from about 10 years ago) that will take a Wolverine scan and get it to 16 or 18 fps without introducing unwanted stutter?
d00m798504092: your post is very unhelpful. Most people are here to do transfers at home, the scanners for that purpose are quite up to the job, it may be possible to improve on them but not affordably. Certainly the Wolverine beats shooting off the wall with your phone. And spare us the word “crap”, we’re not children.
I AM STILL CONFUSED, AT 89 I AM LOOKING FOR THE BEST SUPER 8 & 8 mm SCANNER
THAT CAN DO A GOOD JOB, SAY FOR UNDER $1,000.
I HAVE READ SEVERAL OF THE COMMENTS AND EVEN THE TOP RATED WOLVERINE
BY SOME WAS CONSIDERED AS A NOT WORTH SCANNER.
Hi Robert,
These kind of scanners are not the top of the line but they are the best you can find. The best scanners are those you can find on the labs. For instance, the Hasselblad, could reach a price $4000 but you must request a preorder in order to have this kind of scanner.
Bob did you ever make your videos on how to lift the sound? I have a large number of home movies which have a sound track which I would like to transfer
You have to do the sound transfer separately. Use a projector which is capable to play the sound and do an analogue-digital conversion with a computer. (Avoid using a microphone and connect the audio signal from the projector to the audio input directly.) You may need to find the right connectors / cables that do the trick and adjust the volume for best results.
Then use some audio software to record the sound and label it !
Getting the sound syncing may be challenging. Be creative and cut / add some sound or music.